Gift Cards
Sell gift cards in your WooCommerce store and let customers redeem them at checkout.
Gift cards in Leat are regular WooCommerce products with one extra behaviour: when a customer buys one, Leat generates a gift card code and emails it to the recipient. That recipient can then enter the code at your checkout to spend the balance.
Before creating gift card products in WooCommerce, you need to set up a gift card program in your Leat dashboard first. This is what lets you select a program in the WooCommerce product editor later on. Follow the Manage Gift Cards and Prepaid Value course in the Leat Academy to get that configured.
Setting up a gift card product
A gift card is a regular WooCommerce product with one extra tab in the editor. You can set one up as a simple product with a single price, or as a variable product so customers can pick from multiple values.
Simple product (single price)
Create a new WooCommerce product (or open an existing one) and set the product type to Simple product. Set your price under the General tab, then click the Leat: Giftcard Settings tab.
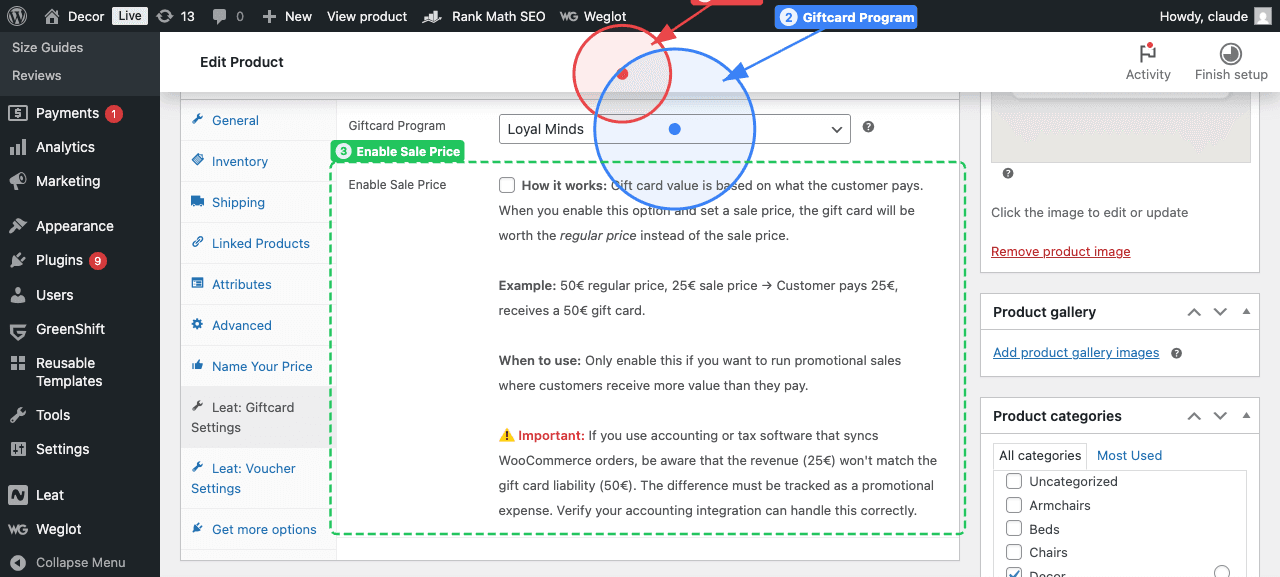
- Virtual (1) - Check this if the gift card is delivered digitally. It removes the shipping fields since there's nothing physical to ship.
- Giftcard Program (2) - Select which Leat gift card program this product belongs to. Programs are managed in your Leat dashboard.
- Enable Sale Price (3) - When enabled, the gift card value is based on the regular price instead of what the customer actually pays. For example, if the regular price is 50 and the sale price is 25, the customer pays 25 but receives a 50 gift card. Only use this for promotions where you intentionally give more value than the payment.
Variable product (multiple prices)
If you want customers to choose from different gift card values (like 10, 20, 50), create a Variable product instead. Set up the Leat gift card tab the same way as above: select the program and configure the sale price option if needed.
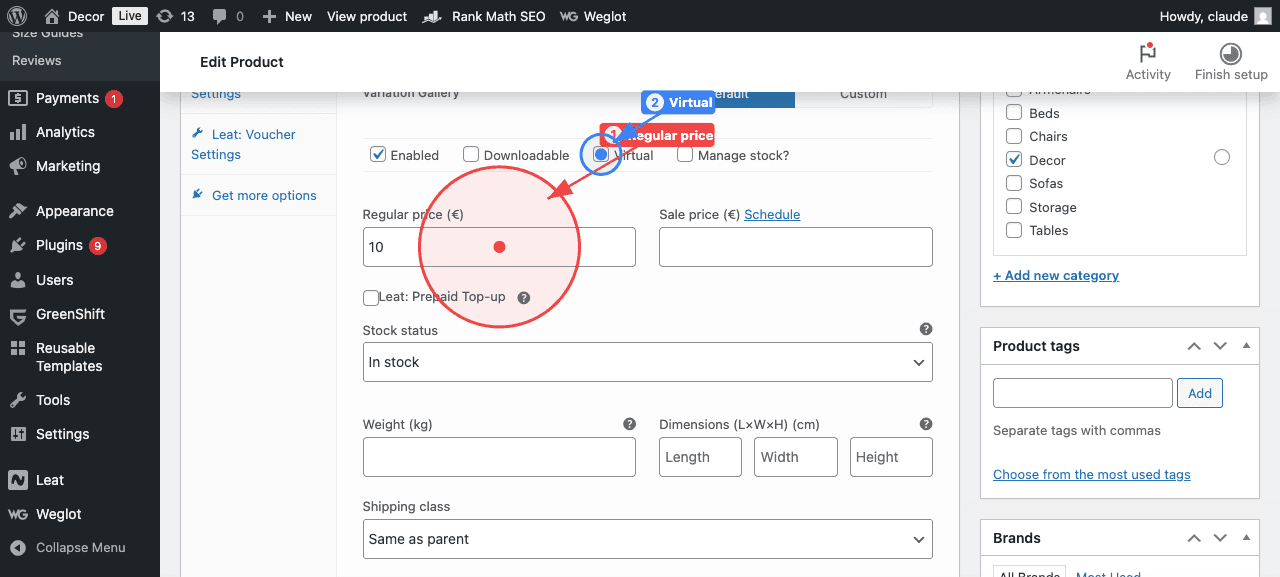
The difference is in the Variations tab. Create a variation for each price tier and set the Regular price (1) on each one. Check Virtual (2) on each variation if the gift card is digital.
Name Your Price (custom amount)
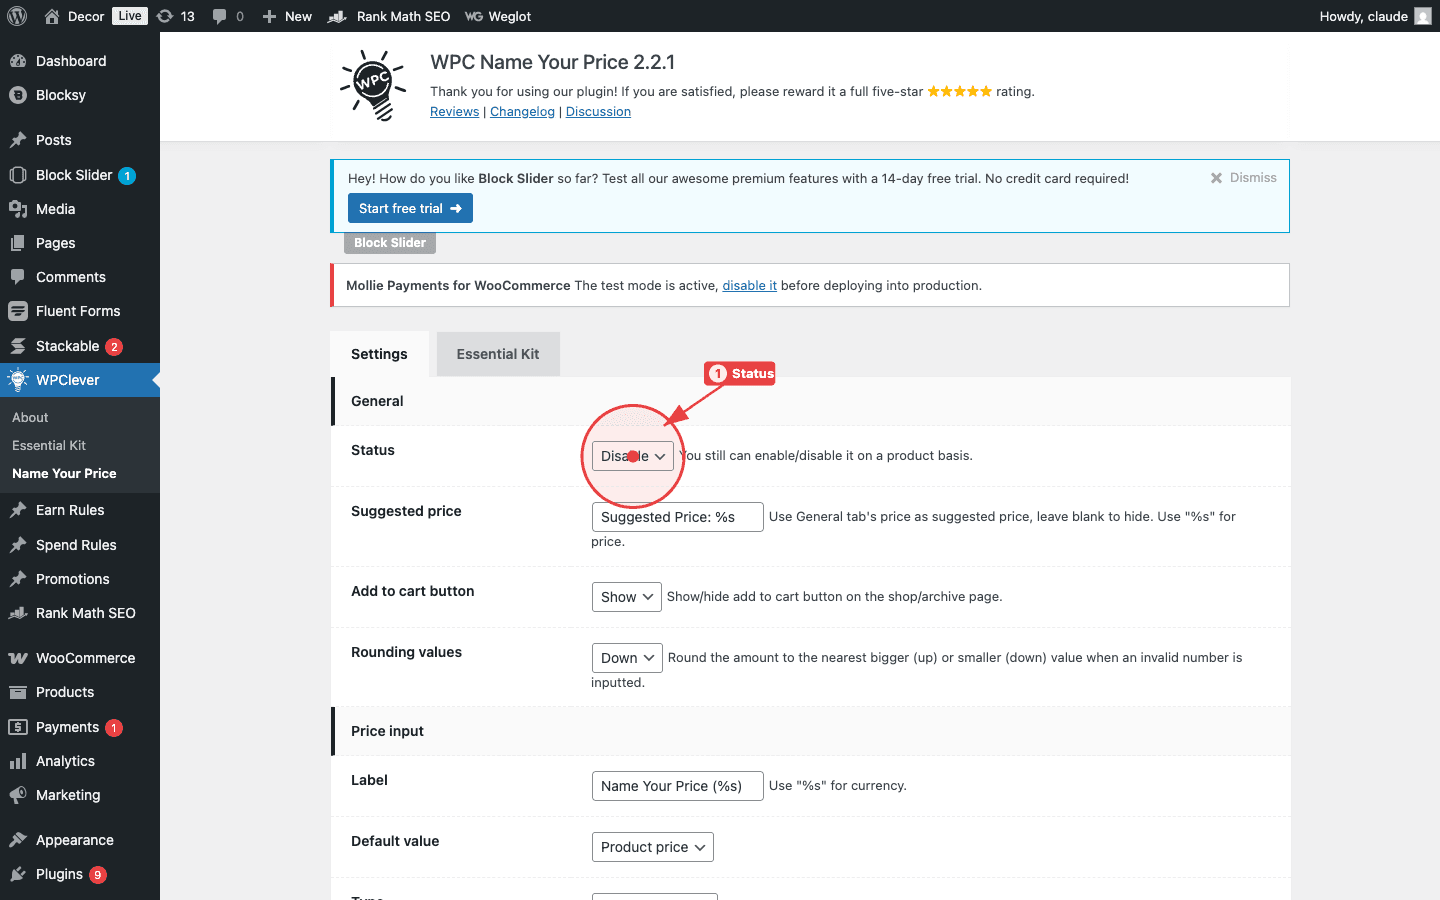
If you want customers to enter their own gift card amount, you can use the WPC Name Your Price plugin. This turns the gift card into an open-value product where customers type in whatever amount they like, within limits you define. This is the only Name Your Price plugin Leat integrates with, so other similar plugins won't work.
Set the product up as a Simple product and enter a Regular price that matches where you want pricing to start. Check Virtual if the gift card is digital, and configure the Leat: Giftcard Settings tab the same way as a regular simple gift card.
Then open the Name Your Price tab in the product data panel. Select Overwrite (1) so this product uses its own Name Your Price rules instead of the global defaults. Set the Type (2) to Input so customers get a free-text field. Under Price constraints (3), configure the minimum, step, and maximum values to control the allowed range.
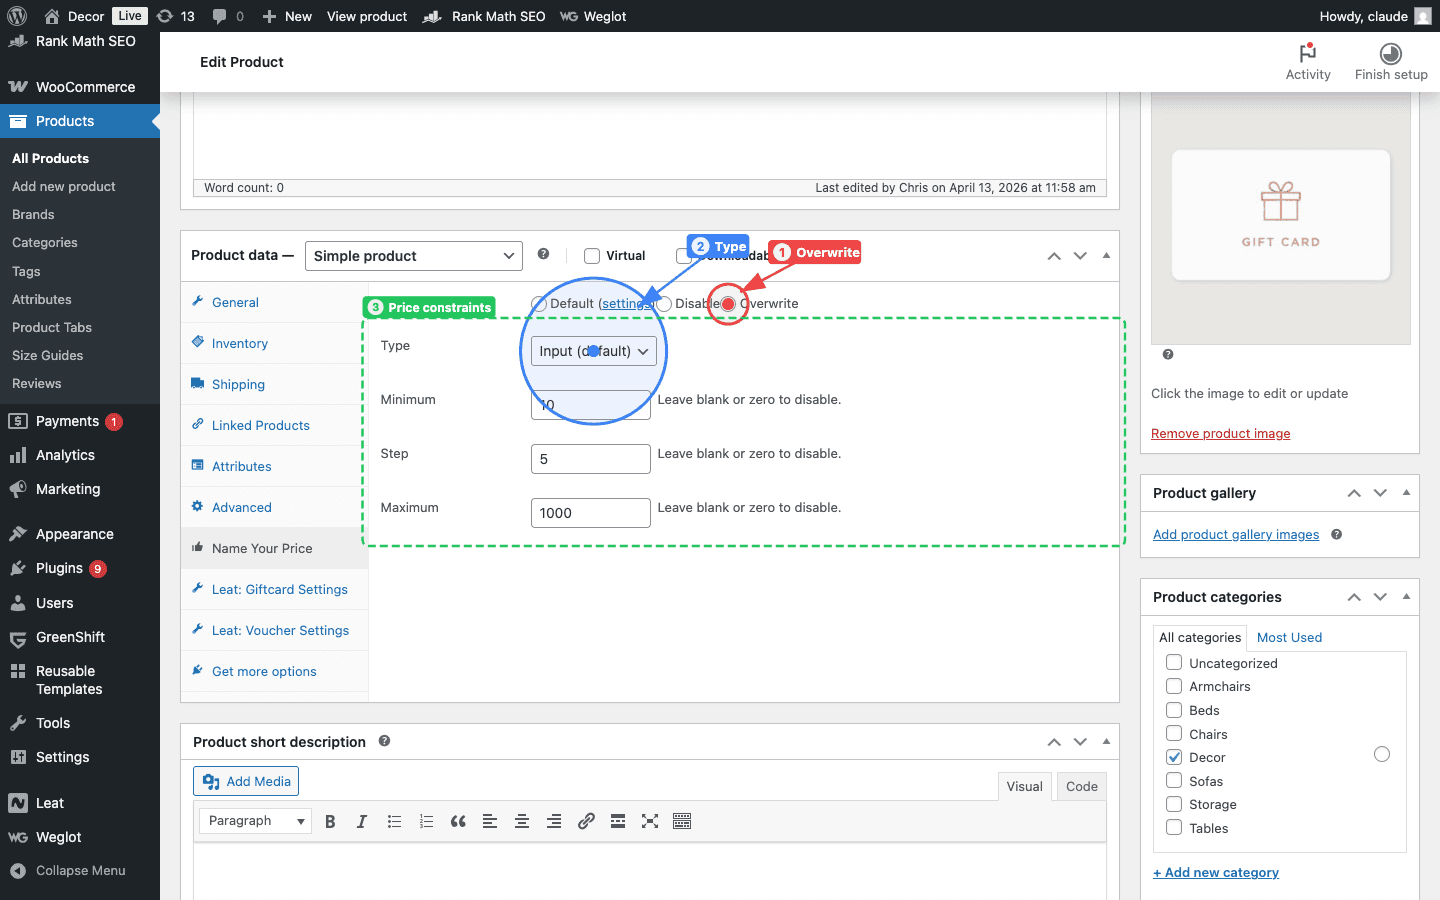
For example, setting a minimum of 10, a step of 5, and a maximum of 1000 means customers can enter 10, 15, 20, and so on up to 1000.
Choosing when gift cards are created
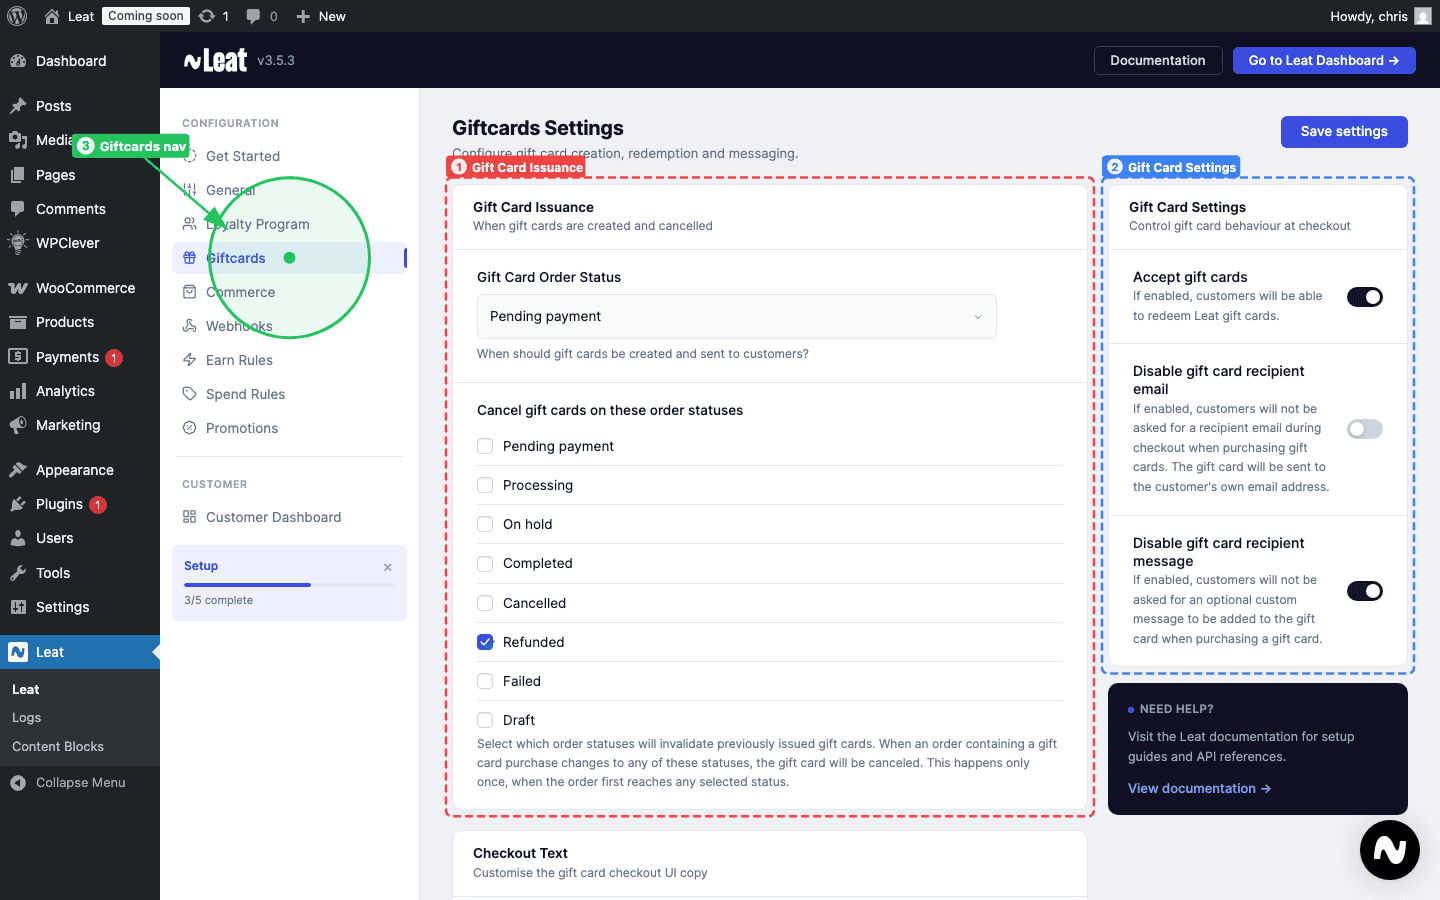
Leat creates and sends the gift card when an order reaches Completed by default. You can change this under Leat > Gift Card Settings with the Gift Card Order Status setting.
If your store delivers digital products right away, triggering on Processing might suit you better than waiting for Completed.
Recipient email
At checkout, customers buying a gift card see a field to enter the recipient's email address. That's where the code gets sent.
If you'd rather skip that field, turn on Disable gift card recipient email under Leat > Gift Card Settings. The code goes to the buyer's billing email instead.
Recipient name
Alongside the recipient email, customers can enter the recipient's name so the gift card email can address them directly. It's optional, so customers can leave it blank.
To remove the field from checkout entirely, enable Disable gift card recipient name under Leat > Gift Card Settings. The field is also suppressed automatically when Disable gift card recipient email is on, since there is no separate recipient to address.
{{ custom.recipient_name }} merge tag in your gift card email template in the Leat dashboard. All custom merge tags must use the custom. prefix.Recipient message
There's also an optional message field customers can use to add a personal note to the gift card email. It's optional, so customers can leave it blank.
To remove the field from checkout entirely, enable Disable gift card recipient message under Leat > Gift Card Settings.
{{ custom.message }} merge tag in your gift card email template in the Leat dashboard. Without it, the message won't appear in the email even though the customer filled it in. All custom merge tags must use the custom. prefix.How delivery works
Once the order reaches the trigger status, Leat creates the gift card and sends the code to the recipient by email. Nothing manual needed on your end.
Accepting gift cards at checkout
Two things need to be in place before customers can redeem gift cards:
- Turn on Accept gift cards under Leat > Gift Card Settings.
- Add the Gift Card Input block to your checkout page in the WooCommerce block editor.
How the gift card input works
On checkout, customers enter their gift card code. The available balance shows up, and they can apply it to the order. The discount comes off their total.
If the gift card balance is higher than the order total, the order is fully covered and the leftover balance stays on the card for next time. Customers can also stack multiple gift cards on a single order.
Cancelling gift cards on refunds
If an order is refunded or cancelled, you can have Leat cancel the associated gift card automatically. Under Leat > Gift Card Settings, the Cancel gift cards on these order statuses setting lets you pick which statuses trigger that.
You can pick more than one status. The cancellation fires the first time an order hits any of the selected statuses and won't repeat if the status changes again.
Customising the checkout text

All the text in the gift card form at checkout is editable under Leat > Gift Card Settings: the form title, input placeholder, button label, balance text, section headings, and every success and error message. No code changes needed.