Selling Vouchers
Sell voucher products in WooCommerce that generate a unique discount code on purchase, delivered to the customer in their order email.
A voucher product is a regular WooCommerce product wired to a Leat promotion rule. When a customer buys one, the plugin asks Leat to issue a fresh voucher, creates the matching WooCommerce coupon, and includes the code in the order confirmation email. Customers can then apply that code to a future order at your checkout.
This is different from the Vouchers page, which covers how vouchers issued elsewhere in Leat (manually, or as part of a promotion campaign) end up usable in your store. Use this page when you want to sell vouchers as products.
How voucher products and promotion rules work together
Every voucher product is tied to a promotion rule. The rule defines what the discount actually does: a percentage off, a fixed amount, free shipping, or a discount on specific products. It also controls minimum order value, whether the code can be combined with other coupons, and which products are eligible.
When the customer buys the voucher product, the new code picks up all of those settings from the promotion rule. There's nothing to configure on the voucher itself. To change how a voucher behaves, update the promotion rule in Leat (see Promotions) and run a sync.
Each issued code is single-use and tied to the buyer's billing email.
Setting up a voucher product
A voucher product is a regular WooCommerce product with one extra tab in the editor. The setup mirrors the gift card setup, so if you've configured those before, this will feel familiar. You can use a Simple product for a single price, a Variable product for multiple price tiers, or pair it with WPC Name Your Price to let customers choose their own amount.
Simple product (single price)
Create a new WooCommerce product (or open an existing one) and set the product type to Simple product. Set your price under the General tab, then click the Leat: Voucher Settings tab.
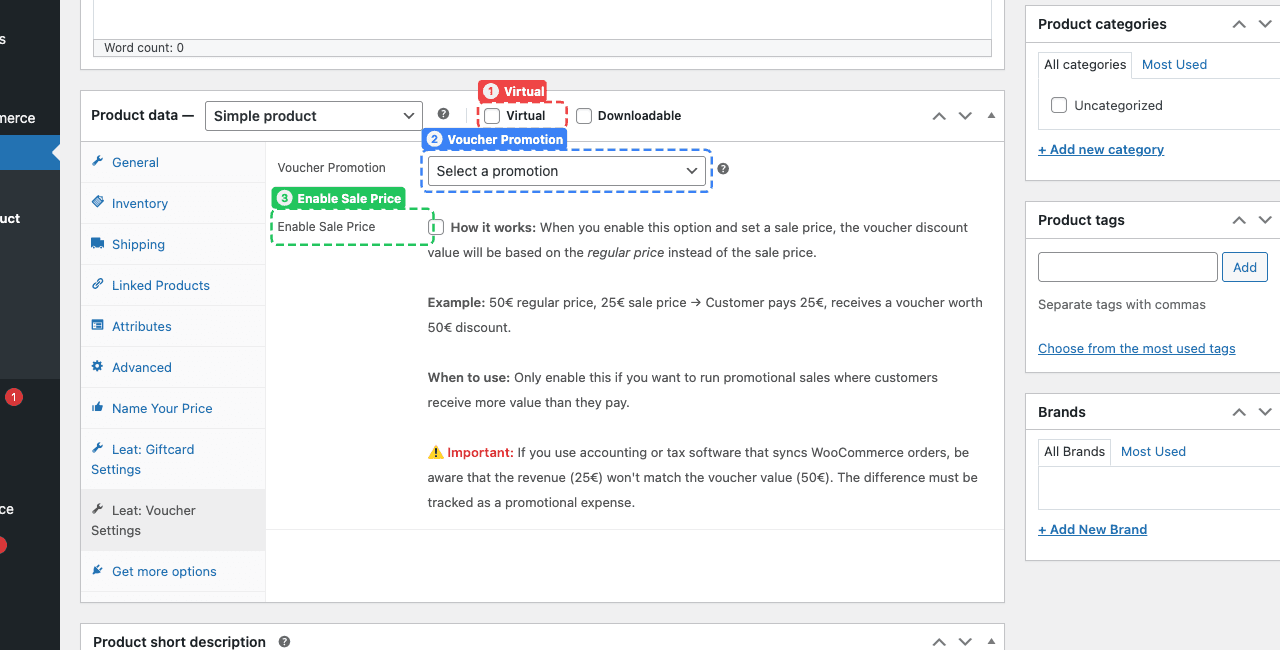
- Virtual (1): Check this if the voucher is delivered digitally. It removes the shipping fields since there's nothing physical to ship.
- Voucher Promotion (2): Select which Leat promotion rule this product issues vouchers for. Promotions are managed under Leat > Promotions.
- Enable Sale Price (3): When enabled, the voucher value is based on the regular price instead of what the customer actually pays. For example, if the regular price is 50 and the sale price is 25, the customer pays 25 but receives a voucher worth 50. Only use this for promotions where you intentionally give more value than the payment.
Variable product (multiple prices)
If you want customers to choose from different voucher values (like 10, 20, 50), create a Variable product instead. Set up the Leat: Voucher Settings tab the same way as above: select the promotion and configure the sale price option if needed.
The difference is in the Variations tab. Create a variation for each price tier and set the Regular price on each one. Check Virtual on each variation if the voucher is digital. The variation editor is identical to gift cards: see the gift card variation example for the layout.
The voucher value follows the chosen variation, so a customer who picks the 50 variation receives a voucher for that amount. Sale pricing also works at the variation level: if a variation has both a regular and sale price and you've enabled Enable Sale Price on the parent, the voucher value comes from the variation's regular price while the customer pays the sale price.
Name Your Price (custom amount)
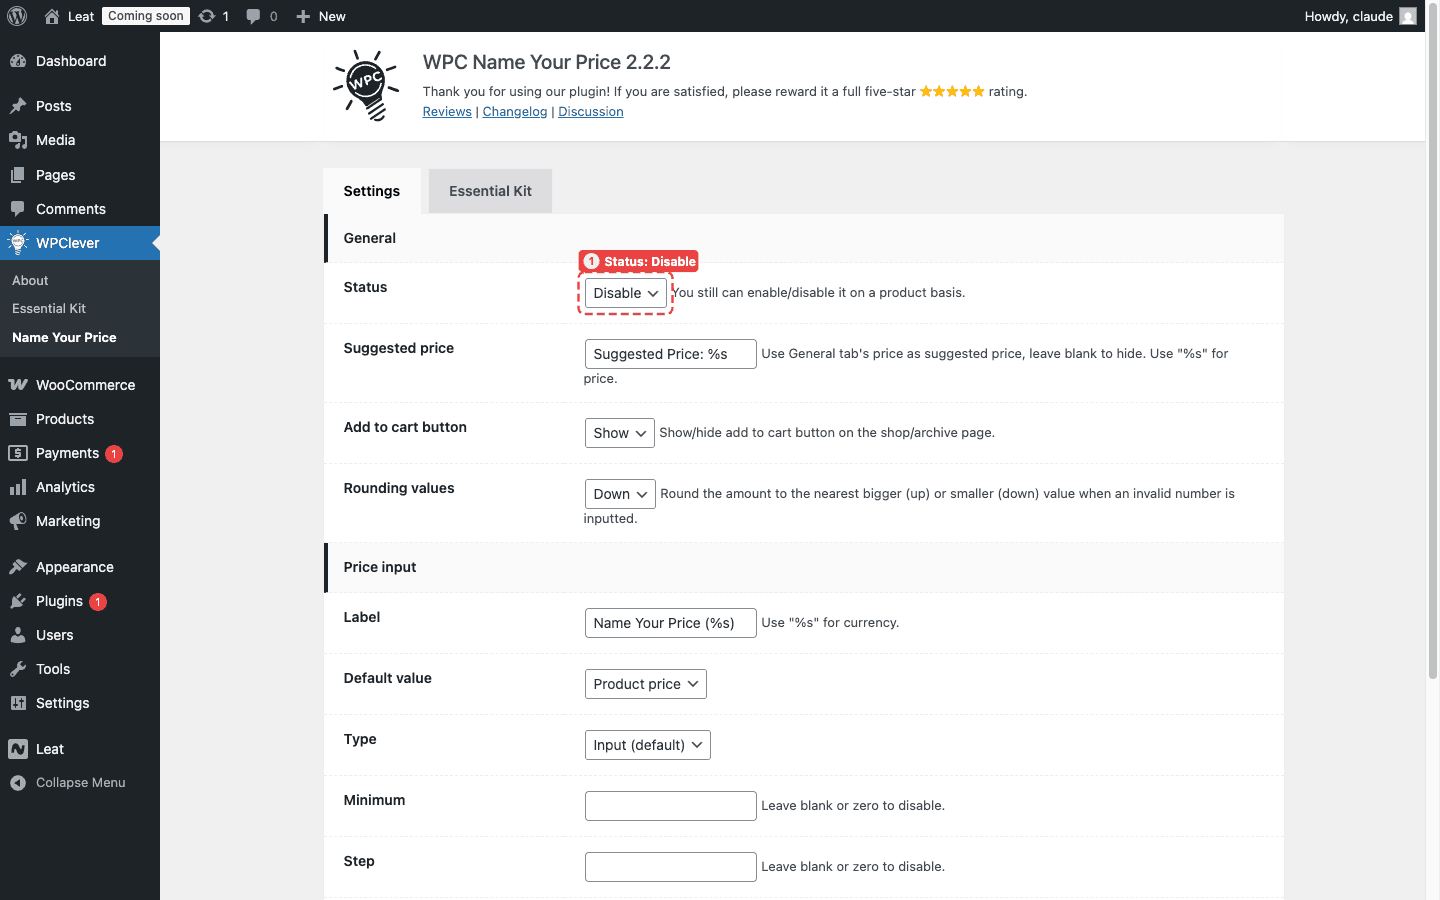
If you want customers to enter their own voucher amount, you can use the WPC Name Your Price plugin. This turns the voucher into an open-value product where customers type in whatever amount they like, within limits you define. This is the only Name Your Price plugin Leat integrates with, so other similar plugins won't work.
Set the product up as a Simple product and enter a Regular price that matches where you want pricing to start. Check Virtual if the voucher is digital, and configure the Leat: Voucher Settings tab the same way as a regular simple voucher.
Then open the Name Your Price tab in the product data panel. Select Overwrite (1) so this product uses its own Name Your Price rules instead of the global defaults. Set the Type (2) to Input so customers get a free-text field. Under Price constraints (3), configure the minimum, step, and maximum values to control the allowed range.
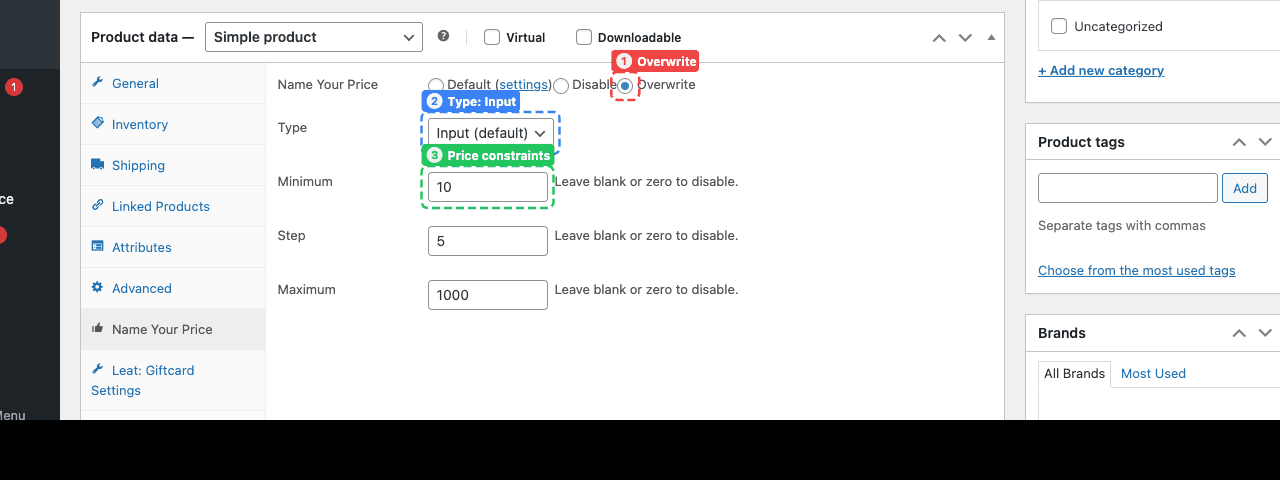
For example, setting a minimum of 10, a step of 5, and a maximum of 1000 means customers can enter 10, 15, 20, and so on up to 1000. The voucher value matches whatever the customer paid.
Delivering voucher codes to customers
Once an order containing a voucher product reaches the trigger status, the plugin issues the voucher in Leat and the code lands in the order confirmation email, right below the relevant line item.
Customers don't need to log in anywhere or check a separate page. The code is just there in their inbox, inside the same order email they already expect.
Configuring when vouchers are created
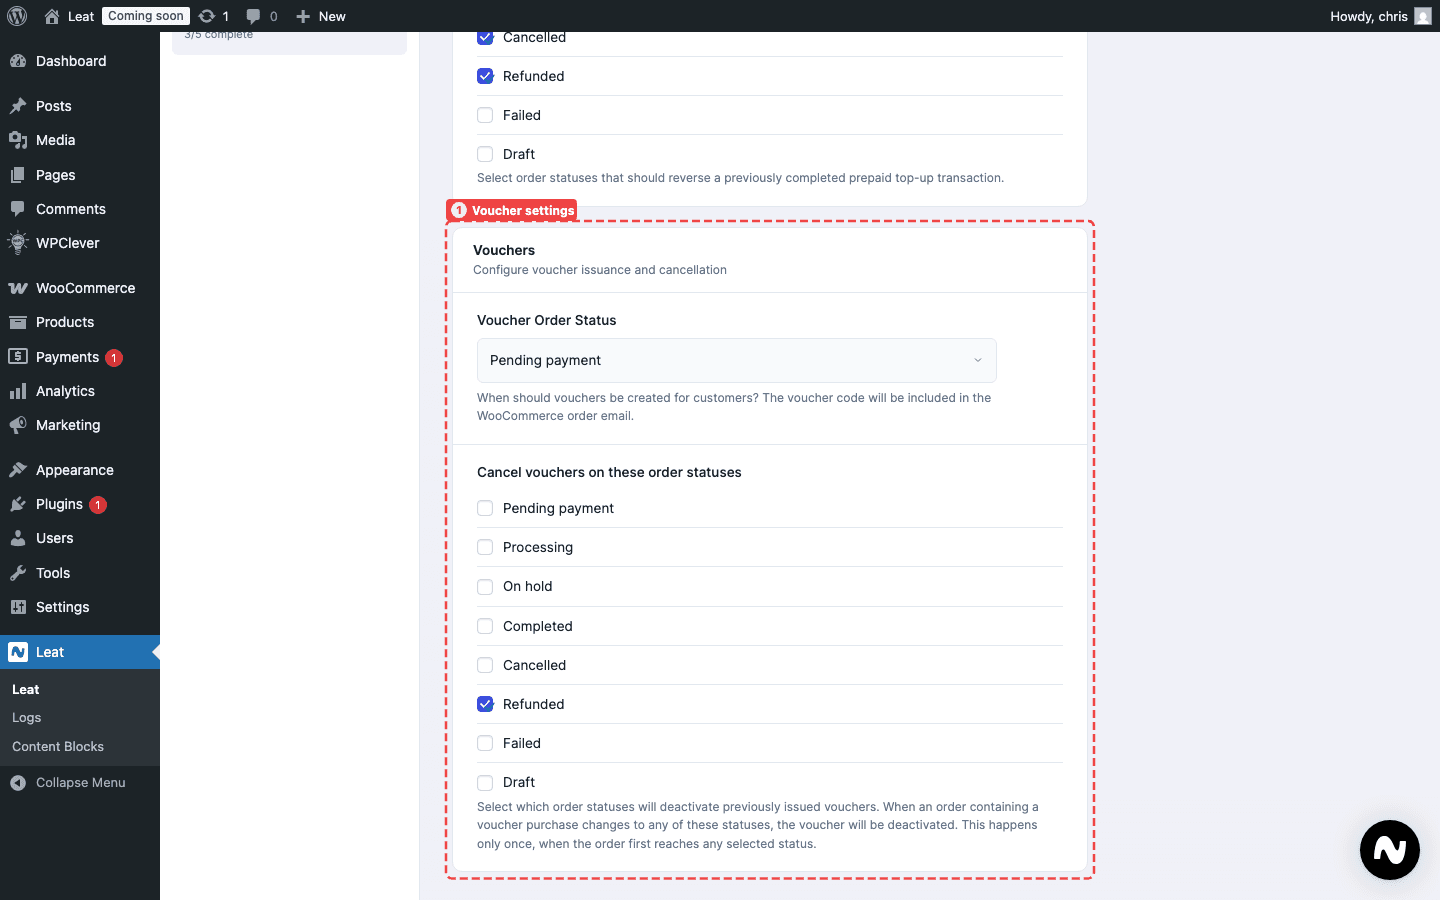
You choose which order status kicks off voucher creation. Head to Leat > Settings > Commerce and find the Voucher Settings section, then look for the Voucher Order Status field. It defaults to completed, so vouchers are only issued once you mark an order as complete.
Common choices:
- completed (recommended): vouchers are issued after fulfilment and confirmed payment. Good for most stores.
- processing: vouchers are issued as soon as payment comes through, before anything ships.
For digital-only stores, processing is usually the right call. For stores shipping physical products, sticking with completed gives you more control.
Cancelling vouchers on order reversal
When an order gets refunded or cancelled, you'll usually want to deactivate the vouchers that came with it. Under Leat > Settings > Commerce, in the Voucher Settings section, the Cancel vouchers on these order statuses field lets you pick which statuses trigger that cancellation.
When an order moves to one of those statuses, the plugin deactivates the voucher in Leat and flips the WooCommerce coupon to draft, so it can't be used anymore.
How customers redeem vouchers
Voucher codes work exactly like any other WooCommerce coupon. The customer copies the code from their email, pastes it into the coupon field at checkout, and the discount is applied. After the order goes through, the voucher is marked as redeemed in Leat.
One thing to keep in mind: vouchers are email-restricted. The customer has to check out with the same email address the voucher was issued to. A different email means the coupon won't apply.