Settings reference
A complete reference for every setting in the Leat WooCommerce plugin.
All settings live under Leat > Settings in your WordPress admin. They are organized into tabs, each covering a different part of the plugin. This page documents every option across every tab.
General settings
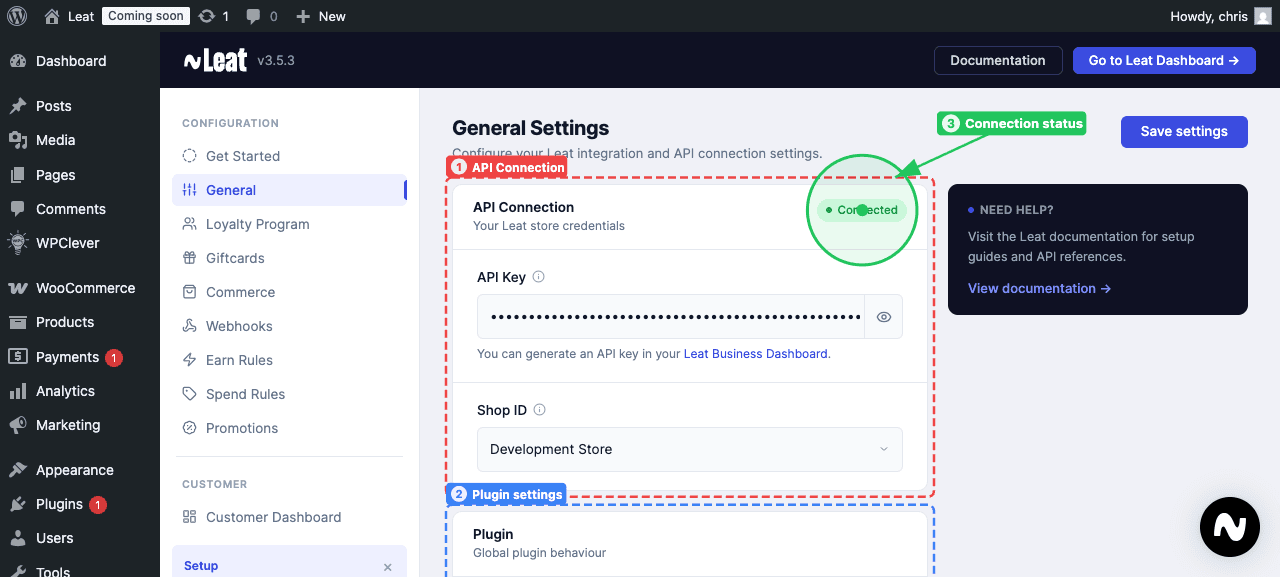
These settings connect your WordPress store to the Leat platform and control some basic plugin behavior.
Enable plugin
Turns the plugin on or off on your store's front end. Disabling it pauses all Leat functionality without fully deactivating the plugin, which is handy if you need a temporary break, for example during a site migration.
API key
Your Personal Access Token from the Leat Business Dashboard. The plugin uses this key to talk to the Leat platform. You can generate one at business.leat.com.
Shop ID
The identifier for the Leat shop this WooCommerce store should connect to. If you manage more than one shop inside Leat, this setting tells the plugin which one to use.
Delete plugin settings upon deactivation
When turned on, all plugin settings are permanently erased when you deactivate the plugin. Leave this off unless you are fully removing Leat and want a clean start.
Loyalty program settings
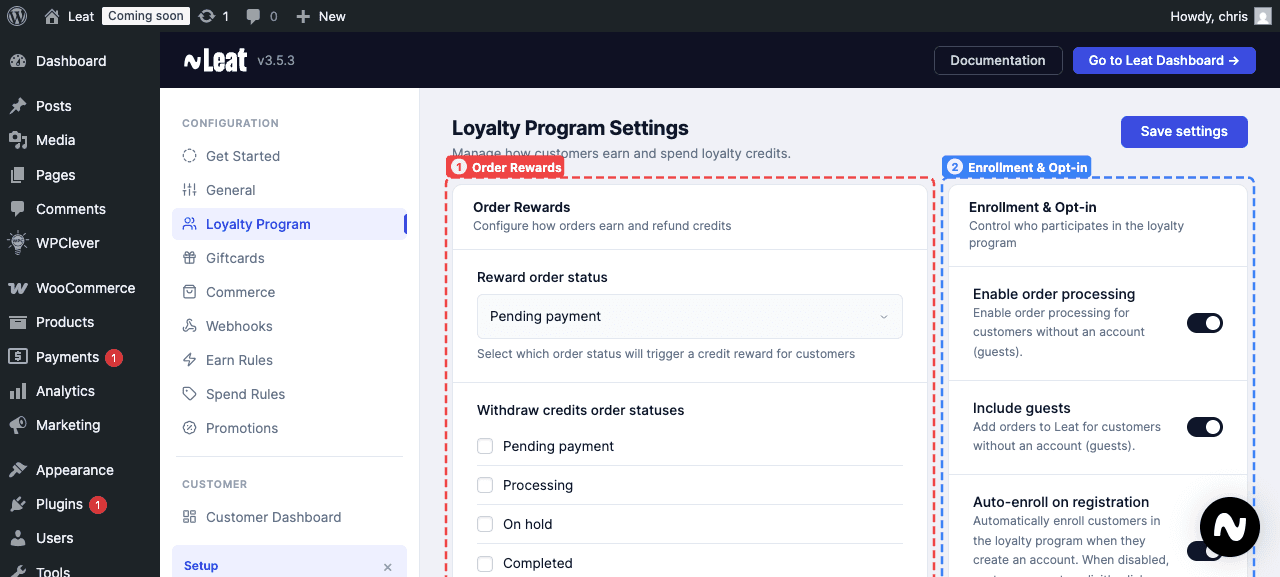
These settings control who earns credits, when they earn them, and how credits are calculated.
Enable order processing
The main switch for loyalty order processing. When this is off, no orders will trigger any credit activity.
Include guests
When turned on, orders from customers without an account are submitted to Leat. When turned off, only logged-in registered customers can earn credits.
Auto-enroll on registration
When turned on, new customers are automatically added to your loyalty program as soon as they create an account. When turned off, customers have to click "Join Program" themselves to opt in.
Reward order status
The WooCommerce order status that triggers credits being awarded. The default is "Completed," so customers receive their credits once an order is marked complete.
Withdraw credits order statuses
The order statuses that trigger a credit reversal. If an order reaches any of the selected statuses, the credits awarded for that order are taken back. The reversal only happens once, the first time the order hits any selected status. Partial refunds are supported for orders in a "Refunded" state.
Reward order parts
Which parts of an order's total count toward the loyalty calculation:
- Subtotal - Product prices before tax. Selected by default.
- Tax - VAT or other product taxes.
- Shipping - Shipping costs, including shipping tax.
- Fees - Payment fees, handling fees, and any other order charges.
Most stores stick with subtotal only, but you can enable others if your program includes them.
Only reward known contacts
When turned on, only customers who already have a contact record in Leat can earn credits. Customers who are new to Leat are excluded unless they actively opt in through the opt-in checkbox (if that feature is enabled).
Enable loyalty opt-in checkbox
Shows a checkbox on the checkout page so customers can opt in to the loyalty program themselves. A customer who checks the box will be enrolled even if they do not yet exist in Leat, and their opt-in overrides the "Only reward known contacts" setting.
Show opt-in for authenticated users
Controls whether logged-in customers see the opt-in checkbox, not just guests. Disable this if you only want to prompt shoppers who are not logged in.
Opt-in checkbox default checked
When turned on, the opt-in checkbox at checkout is pre-checked. Customers are opted in by default unless they actively uncheck the box.
Opt-in checkbox label
The text that appears next to the opt-in checkbox at checkout. Default is "I want to earn loyalty points with this order." You can translate this for multilingual stores.
Dashboard settings
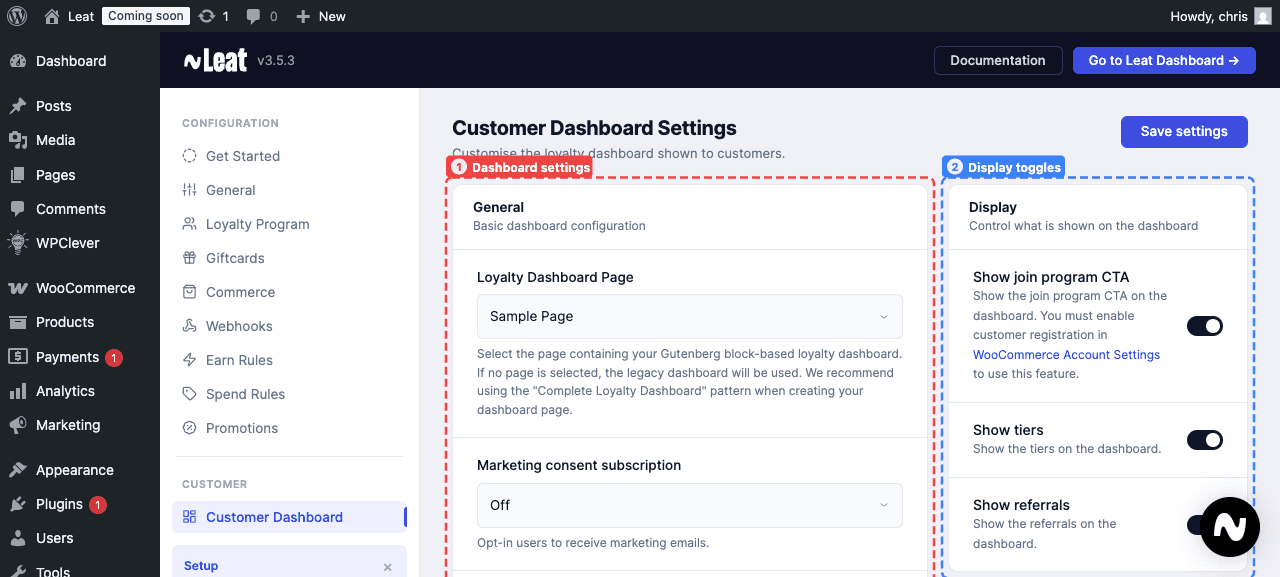
These settings control the text, layout, and visibility of sections on your customer-facing loyalty dashboard.
Loyalty dashboard page
The WordPress page that hosts your loyalty dashboard. It should be a page where you have placed the Leat loyalty dashboard blocks. If nothing is selected, the plugin falls back to the legacy dashboard.
My Account tab title
The label for the loyalty tab inside the WooCommerce My Account area. Default is "Loyalty Program."
Credits name
What you call your loyalty credits, such as "Points," "Stars," or "Coins." This name shows up throughout the dashboard wherever credits are referenced.
Credits balance format
The message that shows a customer how far along they are toward a reward. Supports the placeholders {{ credits }}, {{ credits_currency }}, and {{ credits_required }}. Default is "You have {{ credits }} {{ credits_currency }} out of {{ credits_required }}."
Title (logged in)
The heading shown at the top of the dashboard for a logged-in customer. Supports {{ credits }} and {{ credits_currency }}. Default is "You have {{ credits }} {{ credits_currency }}."
Title (logged out)
The heading shown to visitors who are not logged in. Default is "Join our Loyalty Program and get rewarded when you shop with us."
Log in button
The text on the button prompting visitors to log in. Default is "Log in."
Title (join program)
The heading shown to logged-in customers who have not yet enrolled in the program. Default is "Join our Loyalty Program and get rewarded when you shop with us."
Join program button (join now)
The button text shown to logged-out visitors to start the signup process. Default is "Join now."
Join program button (join program)
The main join button shown to customers who are logged in but not yet enrolled. Default is "Join program."
Show join program CTA
Toggles the join program call-to-action on or off. Customer registration must be enabled in WooCommerce Account Settings for this feature to work.
Show tiers
Toggles the tiers section on the dashboard.
Show referrals
Toggles the referrals section on the dashboard.
Claim reward button
The text on the button customers click to claim a reward. Default is "Claim reward."
Use coupon button
The text on the button that applies a coupon from the coupons section. Default is "Use coupon."
Spend credits button
The text on the button that lets customers unlock a reward by spending credits. Default is "Unlock."
Navigation labels
Each dashboard section has a navigation label you can customize:
| Setting | Default |
|---|---|
| Earn navigation item | Earn {{ credits_currency }} |
| Rewards navigation item | Rewards |
| Coupons navigation item | Your coupons |
| Activity navigation item | Your activity |
| Tiers navigation item | Tiers |
| Referrals navigation item | Referrals |
The earn item supports {{ credits_currency }} to show your custom credits name.
Empty and loading states
| Setting | Default |
|---|---|
| Coupons empty state | You don't have any coupons yet. |
| Coupons loading state | Loading your coupons... |
Referral settings
These settings control all the text inside the referrals section of the loyalty dashboard. Each field supports multiple languages for multilingual stores.
Referrals description
A short paragraph shown at the top of the referrals section that explains the referral program to customers. Default is "Share your referral link with friends and earn rewards when they sign up!"
Referral link title
The label shown above the customer's unique referral link. Default is "Your Referral Link."
Share link button
The text on the button that opens the native share dialog or copies the link. Default is "Share Link."
Share text
The pre-filled body text used when a customer shares their link through a messaging app or social platform. Default is "Join me and start earning rewards!"
Share title
The title included when sharing the referral link. Default is "Referral Link."
People referred label
The label for the counter that shows how many people the customer has referred. Default is "People Referred."
Successful referrals label
The label for the counter that shows how many of those referrals resulted in a completed signup or qualifying action. Default is "Successful Referrals."
Copied message
The short confirmation shown when a customer copies their link. Default is "Copied!"
Gift card settings
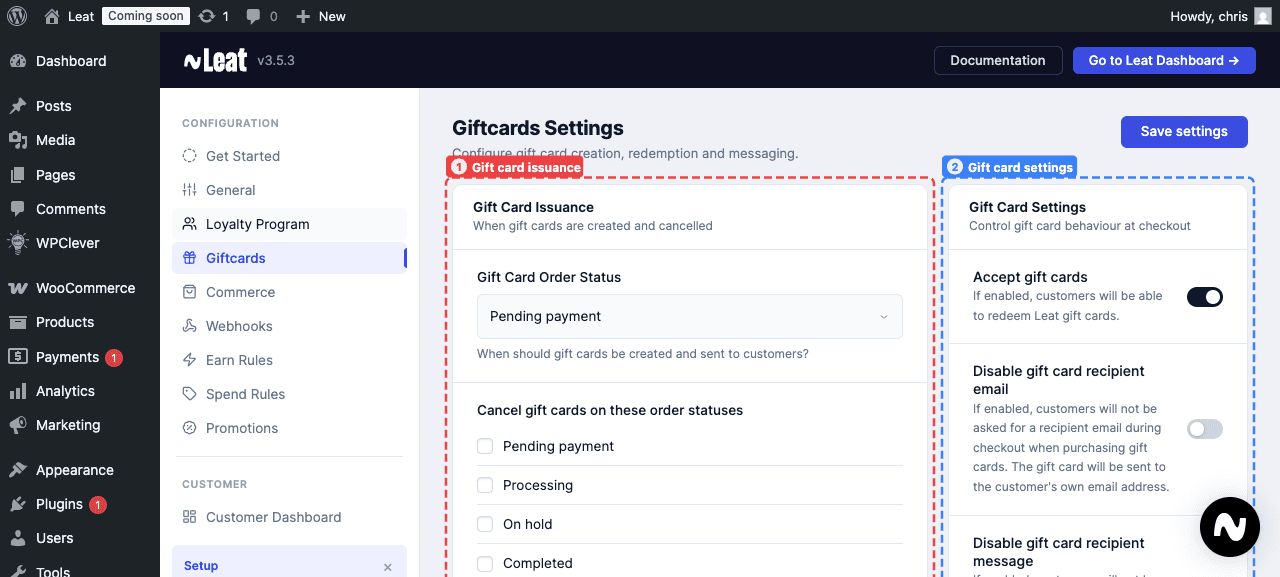
These settings control when gift cards are created and cancelled, and all the text shown to customers during the gift card checkout experience.
Gift card order status
The order status that triggers a gift card being created and sent to the customer. Default is "Completed." Switch this to "Processing" if you want to send gift cards as soon as payment is taken.
Cancel gift cards on these order statuses
The statuses that will invalidate a previously issued gift card. If an order is refunded, for example, you can have the associated gift card cancelled at the same time. The cancellation fires once, the first time the order hits any of the selected statuses.
Accept gift cards
When turned on, customers can enter and redeem Leat gift card codes at checkout.
Disable gift card recipient email
When turned on, the checkout form will not ask for a recipient email address. The gift card goes to the buyer's own email instead.
Disable gift card recipient name
When turned on, customers will not see a field for entering the recipient's name when purchasing a gift card. The recipient name is also suppressed automatically when Disable gift card recipient email is on, since the card goes back to the buyer and there is no third party to address by name.
Disable gift card recipient message
When turned on, customers will not see a field for adding a personal message when purchasing a gift card.
Gift card UI text
Every piece of text shown during the gift card checkout experience can be customized. All fields support multiple languages.
| Setting | Default |
|---|---|
| Form title | Have a gift card? |
| Input placeholder | Enter gift card code |
| Apply button | Apply |
| Checking balance text | Checking gift card balance... |
| Success message | Gift card applied successfully! |
| Applied gift cards section title | Applied gift cards: |
| Balance text | Balance: {{ balance }} |
| Invalid code message | Please enter a valid gift card code |
| Not found message | Gift card not found |
| No balance message | Gift card has no balance |
| Check error message | Error checking gift card |
| Already applied message | This gift card has already been applied |
| Exceeds total message | The gift card amount exceeds the remaining order total |
| Unable to apply message | Unable to apply this gift card. Please try again. |
| Invalid data message | Invalid gift card data |
| Generic error message | An error occurred. Please try again. |
| Removed message | Gift card removed |
Voucher settings
These settings control when voucher codes are generated for customers and when they get cancelled.
Voucher order status
The order status that triggers a voucher code being created for the customer. The code is included in the WooCommerce order confirmation email when this status is reached. Default is "Completed."
Cancel vouchers on these order statuses
The statuses that will deactivate a previously issued voucher. If a customer returns an order that came with a voucher, you can have the voucher cancelled automatically. This fires once, the first time the order hits any selected status.
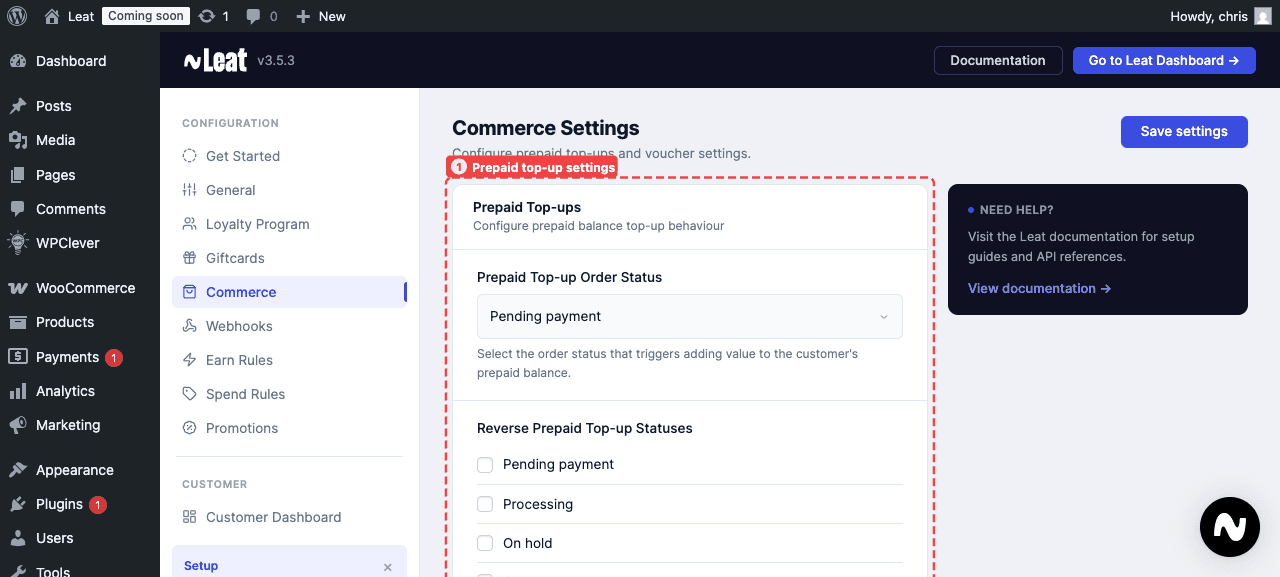
Prepaid settings
These settings apply to prepaid balance products, where customers buy credit to spend in your store.
Prepaid top-up order status
The order status that adds value to a customer's prepaid balance in Leat. Default is "Completed," so the balance is loaded after the order is fully processed.
Reverse prepaid top-up statuses
The order statuses that reverse a previously completed balance top-up. By default this includes both "Refunded" and "Cancelled," so if an order is refunded or cancelled after the balance was added, the funds are pulled back.