Earn rules
Configure what customers see on their loyalty dashboard about how they can earn credits.
Earn rules control what shows up under the "Earn" section of your customers' loyalty dashboard. They're how you tell customers what actions will earn them credits. You manage all of them in your WordPress admin under Leat > Loyalty Program.
Finding earn rules
Go to Leat > Earn Rules in your WordPress admin sidebar. Your earn rules are listed there showing each rule's title and current status, so you can quickly see what's live and what's still sitting as a draft.
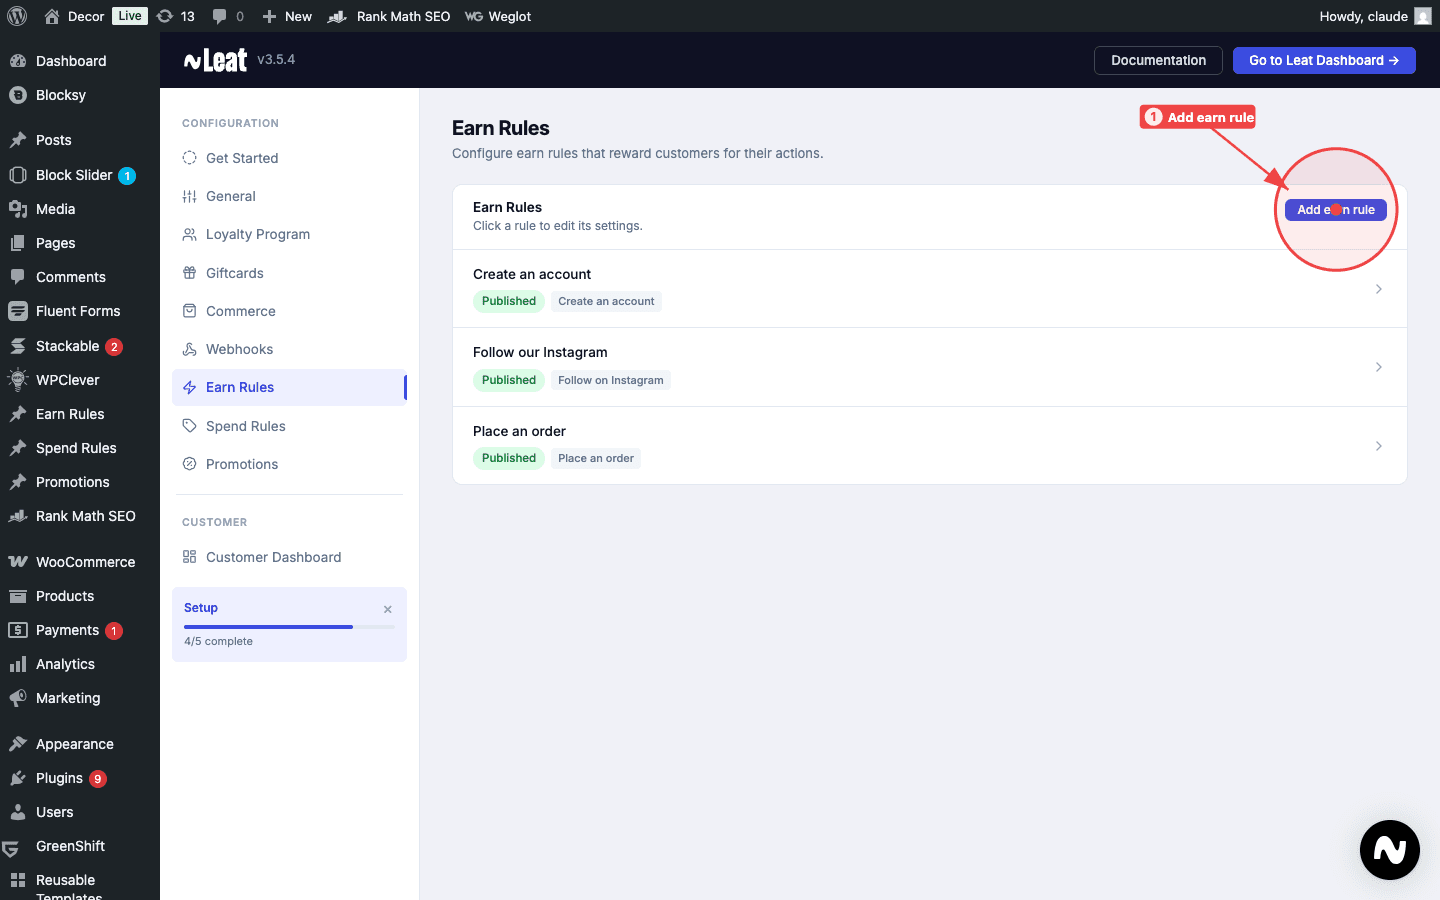
When you click Add earn rule, a modal appears where you pick the rule type. The available types are:
- Like on Facebook
- Follow on TikTok
- Follow on Instagram
- Create Account
- Place Order
Pick a type and give it a title. The title is internal, used only in the admin list to help you tell rules apart.
Types of earn rules
There are two types: an order-based rule and social action rules.
The order-based earn rule
The order-based earn rule is a single rule that tells customers how they earn credits when they shop. Think of it as a description card on the dashboard. It's purely cosmetic, so it describes your program but doesn't actually award credits itself. The real credit calculation happens automatically in the background when an order reaches the right status, as long as Enable order processing is turned on in the Loyalty Program settings.
This rule has a few fields worth knowing about:
- Title - The heading customers see, like "Earn credits on every order."
- Description - A short line explaining the deal, such as "Earn 1 credit for every dollar you spend."
- Credits display - The credit value shown on the card so customers understand roughly what they'll earn.
Because this rule is cosmetic, you only need to set it up once. You don't have to update it when your credit rate changes unless you want the text to stay accurate.
Social action rules
Social action rules reward customers for doing things outside of making a purchase. Following your store on social media, signing up for your newsletter, or leaving a review are all good examples. Customers claim these themselves by hitting the "Claim" button on the rule card in their dashboard.
Each social action rule can only be claimed once per customer. Once they claim it, the credits land in their account and the card shows as claimed so they know it's done.
Some common examples:
- Follow us on Instagram (5 credits)
- Subscribe to our newsletter (10 credits)
- Leave a product review (15 credits)
Configuring an earn rule
Click on any earn rule in the list to expand its configuration form.
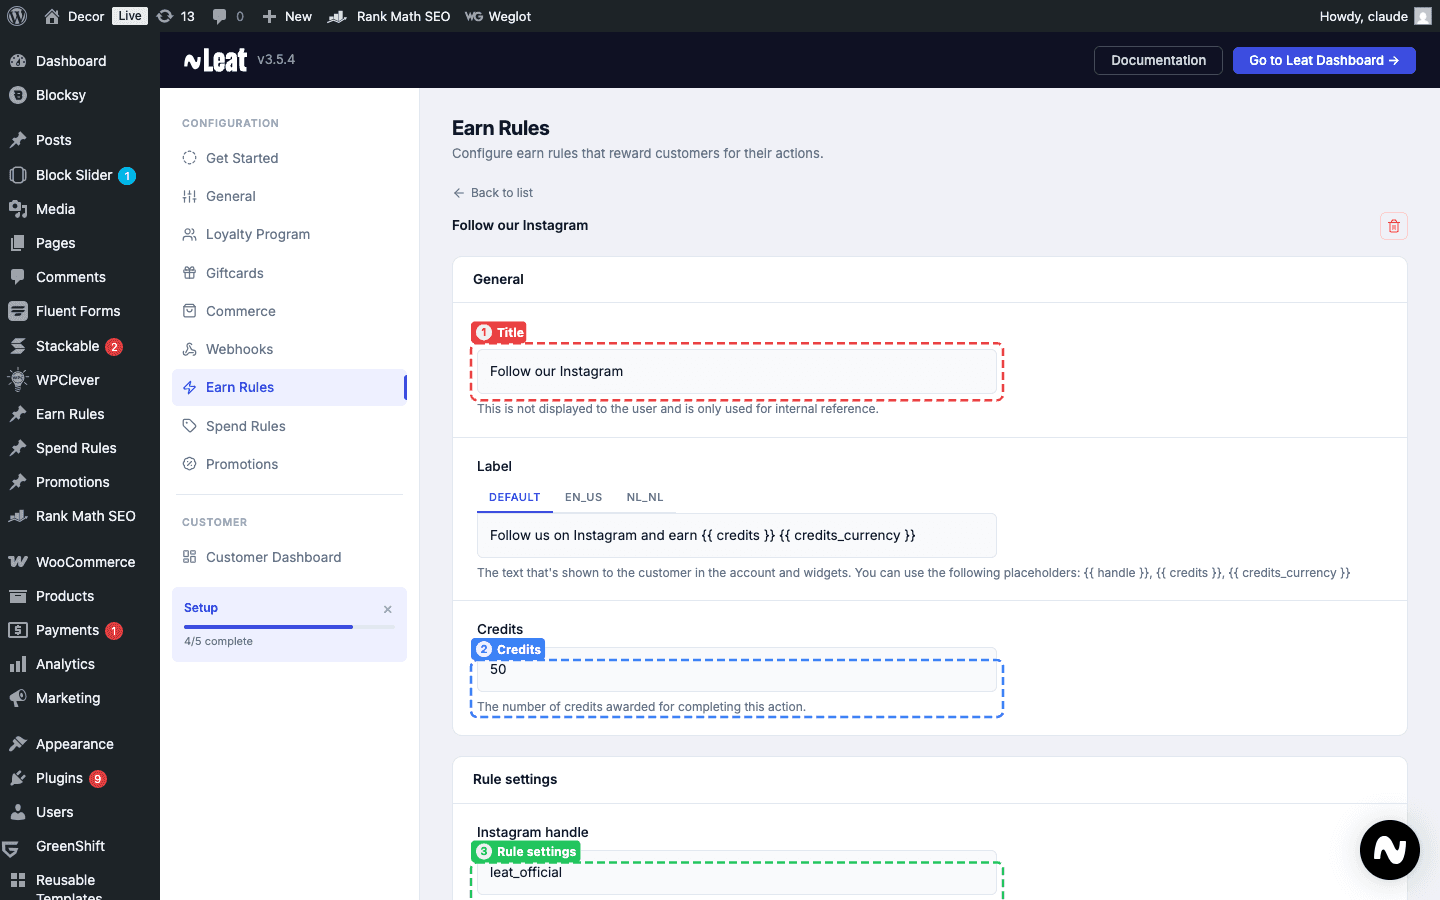
- Title (1) - An internal title used in the admin to identify the rule. Customers see the Label text instead.
- Label - The text shown to customers on the earn rule card. Supports template variables like
{{ credits }}and{{ credits_currency }}. - Credits (2) - The credit amount awarded when the rule is claimed (for social action rules) or displayed (for the order rule).
- Rule settings (3) - Extra configuration specific to the rule type. For example, the "Follow on Instagram" rule has an Instagram handle field.
- Status - Whether the rule is visible to customers or not.
Fill in the fields and save. The rule won't show up on the customer dashboard until the status is set to active.
Setting a rule to active
Every earn rule starts as a draft. Drafts don't show up for customers at all. When you're ready to go live, open the rule, change the Status dropdown to Published, and save.
If you want to pull a rule off the dashboard without deleting it, just set it back to draft. All your settings stay put and you can republish it whenever you're ready.
The Earn Rules List block
The Earn Rules List is a Gutenberg block that shows your active earn rules on any page. You'll typically drop it onto your loyalty dashboard page. Each rule appears as a card with its title, description, credit value, and a claim button for social action rules.
You can add it in two ways:
- As a block - Open the block inserter (+) in the editor, search for "Earn Rules List", and drop the
leat/earn-rules-listblock onto your page. - As a pattern - Open the block inserter, switch to the Patterns tab, and look for Earn Rules Section under the Leat category. This pattern wraps the block in a styled section with a heading and description, ready to go.
For a full walkthrough on working with Leat blocks and patterns, see the Customer Dashboard guide.
There are a few display settings you can tweak in the block editor:
- Columns - How many cards appear side by side (defaults to 3).
- Show claimed rules - Whether customers can still see rules they've already claimed.
- Show to guests - Whether the section is visible to people who aren't logged in.
- Button text - Custom labels for the claim, sign-in, and join-program buttons.
- Credits badge - A small badge on each card showing the credit value. You can turn it off or restyle it.
The block loads content dynamically based on who's viewing it. Guests see a prompt to sign in. Enrolled customers see rules they can claim. Customers who have an account but haven't joined the program see an invite to do so.